
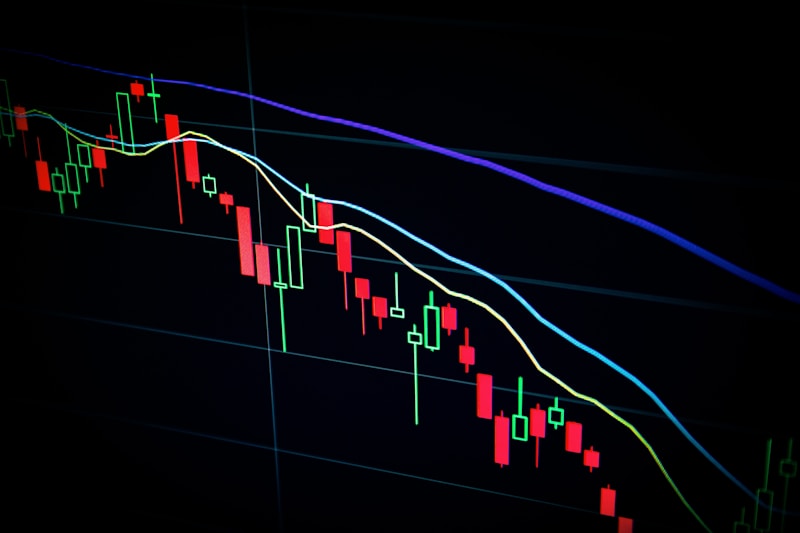
Trading indicators help traders analyze market trends, momentum, volatility, and market participation in a disciplined, structured framework. While traders use these tools to interpret price action and spot technical setups, indicators cannot predict future price movements with certainty, nor can they guarantee profitable outcomes. An indicator's practical utility depends on understanding its underlying calculation, tuning its parameters to current market conditions, aligning it with the appropriate timeframe, and integrating strict risk management. This guide from Evest Academy Pro provides a practical overview of technical indicators, the distinction between leading and lagging tools, how trend, momentum, volatility, and volume indicators function, how to pair them without redundant signals, and the key pitfalls to avoid when integrating them into an active trading plan.
What Are Trading Indicators and How Do They Work?
Technical indicators are mathematical calculations based on historical price, volume, or open interest data. The results are plotted on a chart as lines, bands, histograms, or numeric oscillators. These tools are designed to simplify raw market data and help traders quantify dynamics that are difficult to evaluate from price alone—such as trend strength, velocity of price movement, volatility levels, and institutional participation.
Because technical indicators derive entirely from historical inputs, they have no predictive power on their own. Instead, they organize past price action to help traders establish probabilistic scenarios. For example, a moving average smooths price data to highlight the prevailing trend over a chosen lookback period, the Relative Strength Index (RSI) quantifies momentum velocity, and the Moving Average Convergence Divergence (MACD) tracks the interaction between trend and momentum.
An indicator's performance varies dramatically across different market regimes. A moving average can be highly effective in a sustained, directional trend, yet generate frequent whipsaws in a choppy, range-bound market. Similarly, an indicator's reading on a daily chart carries vastly different implications than on a 5-minute chart, even when identical settings are applied.
Crucially, an indicator does not produce turnkey trading decisions. Every reading requires contextual interpretation alongside market structure, key support and resistance zones, volatility conditions, and clear invalidation levels. Proper execution begins with understanding the function and limitations of each tool before acting on its signals.
Technical Indicators vs. Fundamental Indicators
Technical indicators such as the RSI, the MACD, and moving averages rely strictly on historical price and volume data. Traders use them to evaluate trend direction, momentum shifts, volatility, and chart patterns.
Fundamental indicators, by contrast, rely on economic and financial data such as interest rate decisions, inflation gauges, GDP releases, corporate earnings reports, and inventory figures. They are designed to assess the intrinsic value and macroeconomic drivers governing an asset.
Technical analysis asks: What is the price doing right now? Fundamental analysis asks: Why is the asset moving, or why should it move?
Fundamental analysis might identify macro tailwinds for an asset—such as accelerating corporate revenue or supply deficits—while technical analysis helps traders determine whether the market is actively validating that thesis through an established uptrend, and where high-probability execution levels sit.
| Comparison Metric | Technical Indicators | Fundamental Indicators |
|---|---|---|
| Data Source | Price and trading volume | Economic, financial, and macro data |
| Primary Objective | Analyze trend, momentum, and volatility | Evaluate fair value and economic drivers |
| Visual Format | Chart overlays, sub-window lines, histograms | Macro reports, financial statements, releases |
| Application | Timing entries, exits, and technical levels | Assessing broad economic context |
| Limitation | Purely derived from historical data | Precise market timing is difficult to capture |
Traders often synthesize both approaches for a well-rounded market view. However, alignment between technicals and fundamentals does not eliminate downside risk. A fundamentally undervalued asset can remain locked in an aggressive downtrend for extended periods if market liquidity or broader sentiment fails to support it.
Leading vs. Lagging Indicators
Trading indicators generally fall into two broad classifications: leading indicators and lagging indicators. Leading tools attempt to anticipate market turns before a new trend becomes obvious on the chart, while lagging indicators track price action and confirm trends that are already underway.
Common leading indicators include the RSI and the Stochastic Oscillator. Because they measure momentum, they are frequently used to identify divergence and overextended conditions. While they can provide early warnings of trend exhaustion, their sensitivity makes them more vulnerable to false signals.
Lagging indicators, such as moving averages and the MACD, depend on completed price moves. While their confirmation comes later in the development of a move, their slower reaction time filters out market noise and helps traders stay aligned with dominant trends.
| Attribute | Leading Indicators | Lagging Indicators |
|---|---|---|
| Timing | Anticipate turns early | Confirm established trends |
| Responsiveness | Highly sensitive to price shifts | Slower, smoothed reaction |
| False Signal Rate | Higher frequency of whipsaws | Lower frequency of false signals |
| Examples | RSI, Stochastic Oscillator | Moving Averages, MACD |
| Best Application | Identifying momentum exhaustion | Validating trend direction |
Labeling an indicator as "leading" does not imply superiority, nor does "lagging" mean ineffective. The optimal choice depends on your trading strategy, execution timeframe, current market conditions, and required level of confirmation.
Types of Technical Trading Indicators
No single indicator serves every function. Some are engineered to define trend direction, others quantify momentum velocity or volatility, and certain tools plot dynamic support and resistance thresholds.
Effective technical analysis begins with identifying the precise question you need answered. If you need to assess broad trend direction, stacking three momentum oscillators is counterproductive. If you need to evaluate volatility, a standard moving average alone is insufficient.
Common technical indicators are classified into trend indicators, momentum indicators, volatility indicators, volume indicators, and support and resistance tools.
Trend Indicators: Moving Averages and MACD
Trend indicators help traders determine whether an asset is trending upward, downward, or consolidating sideways. Among the most widely adopted are the Simple Moving Average (SMA), the Exponential Moving Average (EMA), and the MACD.
Simple Moving Average (SMA)
The Simple Moving Average calculates the arithmetic mean price of an asset over a specified number of periods. For example, a 20-period SMA sums the closing prices of the last 20 periods and divides that total by 20.
This smoothing mechanism reduces the visual impact of short-term price noise, clarifying the underlying directional bias. When price trades consistently above a rising moving average, it confirms an uptrend; conversely, sustained trading below a downward-sloping average indicates persistent selling pressure.
However, because the SMA assigns equal weight to every period in the calculation, it responds relatively slowly to sudden market reversals.
Exponential Moving Average (EMA)
The Exponential Moving Average applies greater weighting to the most recent price data. Consequently, it responds to real-time price action faster than an equivalent-length SMA.
While this responsiveness makes the EMA well-suited for short- to medium-term analysis, it can also produce more false signals during erratic consolidations and sideways ranges.
A classic application involves tracking moving average crossovers, where a shorter-term moving average crosses above or below a longer-term baseline. A shorter-term average crossing above a longer-term one suggests building upward momentum, whereas a downward cross reflects deteriorating momentum.
Crucially, crossovers should never be traded in isolation; their technical validity increases significantly when confirmed by broader market structure, momentum oscillators, and volume profile.
MACD Indicator
The MACD typically consists of the MACD line, the signal line, and the MACD histogram. By measuring the spread between two separate moving averages, it bridges the gap between trend following and momentum analysis.
A bullish signal occurs when the MACD line crosses above the signal line, while a cross below suggests a potential bearish phase.
The histogram measures the absolute distance between the MACD line and its signal line, offering visual insight into accelerating or decelerating momentum.
However, in range-bound markets, the MACD can generate repetitive, low-conviction signals. Furthermore, because its calculations rely on moving averages, signals naturally lag the absolute turning point of the market.
Momentum Indicators: RSI and Stochastic Oscillator
Momentum indicators measure the velocity and magnitude of price changes, helping traders evaluate whether a move is gaining strength or losing steam.
Relative Strength Index (RSI)
The RSI is a benchmark oscillator bounded between 0 and 100. Traditionally, readings above 70 are categorized as overbought, while prints below 30 denote oversold territory.
However, an RSI crossing above 70 is not an automatic sell signal, nor does a dip below 30 warrant an immediate long position. In powerful, sustained trends, the RSI can remain anchored in extreme territory for substantial periods without triggering a reversal.
The RSI must always be evaluated within structural market context. In an established uptrend, pullbacks that cause the RSI to reset toward lower levels often reflect healthy consolidation rather than an impending trend reversal.
Another core technique is trading divergence, which occurs when price prints a higher high while the RSI records a lower high. This regular divergence suggests weakening buying momentum, though it still requires price-action confirmation before execution.
Stochastic Oscillator
The Stochastic Oscillator evaluates an asset's closing price relative to its high-low range over a specified lookback period. It consists of two lines, %K and %D, with their crossovers used to time shifts in momentum.
While the Stochastic can be effective for identifying turning points within defined trading ranges, it produces an elevated number of false crossover signals during sustained directional trends and high-volatility environments.
Traders should avoid acting on crossovers alone, prioritizing signals that align with overall market structure and key horizontal levels.
| Comparison Metric | RSI | Stochastic Oscillator |
|---|---|---|
| Primary Function | Measure momentum velocity | Compare close to price range |
| Standard Scale | 0 to 100 | 0 to 100 |
| Core Applications | Overbought/oversold, divergence | Momentum shifts, line crossovers |
| Key Limitation | Can linger in extremes during trends | Generates false signals in trending markets |
| Optimal Regime | Trending markets, structural divergence | Range-bound, sideways markets |
Volatility Indicators: Bollinger Bands and ATR
Volatility indicators track the dispersion and range of price action over time. While they do not explicitly predict directional bias, they indicate whether market movement is contracting or expanding.
Bollinger Bands
Bollinger Bands consist of a central simple moving average flanked by an upper and lower band plotted at a set number of standard deviations from the centerline.
When the bands contract, it indicates a period of declining volatility known as a squeeze, which often precedes a sharp volatility expansion. However, the direction of the subsequent breakout cannot be determined by the squeeze alone.
Conversely, widening bands reflect expanding market volatility. During an aggressive uptrend, price often rides the upper band, while strong downtrends push price persistently along the lower band.
A touch of the upper band does not imply an immediate short, nor does a touch of the lower band justify an immediate buy. The bands quantify relative price location within current volatility, not standalone reversal triggers.
Average True Range (ATR)
The ATR measures the average range of price movement over a defined series of periods, providing a direct numerical metric of prevailing market volatility.
Traders frequently use the ATR to calibrate stop-loss distances to current market conditions. In high-volatility environments, overly tight stops are easily triggered by normal market fluctuation; conversely, excessively wide stops in quiet markets compromise risk-reward ratios.
The ATR is equally valuable for position sizing. As volatility expands and requires a wider stop loss, position size should decrease proportionally to keep total capital risk constant across setups.
Note that the ATR is completely non-directional; it does not indicate which way the market will break, only how actively it is moving.
Volume Indicators: On-Balance Volume (OBV)
Trading volume provides critical context regarding the degree of institutional participation behind a price move. It helps traders verify whether a breakout is backed by genuine liquidity or running on thin participation.
The On-Balance Volume (OBV) indicator maintains a cumulative volume line, adding volume on days when the price closes higher and subtracting volume on days when it closes lower.
When price and the OBV advance together, volume confirms trend strength. Conversely, if price pushes to new highs while the OBV fails to confirm with higher peaks, it suggests institutional divergence and potential trend exhaustion.
However, the reliability of volume indicators depends heavily on the market traded. Centralized equity exchanges provide definitive volume figures, whereas decentralized markets like spot forex rely on tick volume, which measures price changes rather than aggregate capital traded.
Traders must verify the nature of their data feed before relying on volume metrics for risk deployment.
Support and Resistance Tools: Fibonacci Retracements and Pivot Points
Support and resistance tools help traders identify objective inflection areas where price is likely to react, stall, or reverse. Among the most popular are Fibonacci Retracements and Pivot Points.
Fibonacci Retracement
Fibonacci Retracements apply mathematical ratios derived from the Fibonacci sequence to map potential correction zones within an established impulse move. Plotted between a structural swing low and swing high, traders monitor key retracement ratios such as 38.2%, 50%, and 61.8%.
While price frequently interacts with these ratios, a Fibonacci level does not become structural support or resistance simply by appearing on the chart. Its technical validity increases substantially when confluent with previous market structure, moving averages, or high-volume nodes.
Pivot Points
Pivot Points use the previous session's high, low, and close to calculate a central pivot level along with derived support and resistance boundaries. Commonly deployed in intraday strategies, they provide clear session-based reference levels. Like Fibonacci levels, Pivot Points do not guarantee market reversals; they become actionable primarily when aligned with prevailing price action and established technical zones.
Summary Table of Popular Technical Indicators
| Indicator | Primary Function | Best Application | Key Limitation |
|---|---|---|---|
| SMA | Smooths price and defines trend | Tracking broad directional bias | Lags market turns |
| EMA | Tracks trend with emphasis on recent data | Short- to medium-term setups | Generates whipsaws in ranges |
| RSI | Measures momentum strength | Overbought/oversold, divergence | Can linger in extremes during trends |
| MACD | Analyzes trend and momentum convergence | Confirming structural momentum shifts | Slower lagging confirmation |
| Bollinger Bands | Tracks volatility expansion and contraction | Squeezes and volatility breakouts | Band touches are not entry signals |
| ATR | Quantifies price range and volatility | Dynamic stop placement and position sizing | Lacks directional bias |
| OBV | Measures cumulative volume flow | Trend confirmation and volume divergence | Dependent on data feed quality |
| ADX | Measures trend strength | Distinguishing trends from ranges | Does not show trend direction |
How to Choose the Right Indicator
Selecting technical indicators begins with identifying the specific market information you require, rather than seeking the most complex tool or one that generates the highest signal frequency.
If you need to determine the primary trend, moving averages or the MACD provide a practical foundation. If your goal is to evaluate the internal velocity of a move, the RSI or Stochastic Oscillator is more appropriate. To quantify current market volatility, the ATR or Bollinger Bands are direct solutions.
Before adding any indicator to your chart, consider the following checklist:
- What specific market question am I trying to answer?
- Does this tool measure trend, momentum, volatility, or volume?
- Is the current market regime trending or consolidating?
- What timeframe am I operating on?
- Has this indicator been tested across historical data on this specific asset?
- Does this indicator provide unique information, or does it duplicate an existing tool?
There are no universal settings that work across every asset and market regime. Shorter lookback periods make an indicator more sensitive but increase false signals, while longer parameters smooth out noise at the expense of trade timeliness.
Indicator settings must be backtested on historical data and verified across forward-testing environments before deployment in a live trading plan.
How to Combine Trading Indicators Effectively
When combining technical indicators, select tools that measure uncorrelated market variables rather than stacking multiple indicators that calculate the same underlying metric.
A classic multi-factor approach pairs a moving average to establish the primary trend, the RSI to evaluate momentum within that trend, and the ATR to quantify volatility and calibrate appropriate stop-loss placement.
In this framework, each tool answers a unique operational question:
- What is the structural direction of the market?
- Is momentum confirming the move?
- What is the current volatility and risk profile?
While confluence across indicators strengthens a technical hypothesis, it does not guarantee a profitable outcome. Structural price action, timeframe alignment, invalidation levels, and portfolio risk parameters must always guide the final trade decision.
A frequent pitfall is pairing the RSI with the Stochastic Oscillator under the assumption that they provide independent confirmation. Because both are momentum oscillators derived from recent price changes, this creates indicator redundancy—generating identical readings disguised as multiple confirmations.
Advanced Indicators: Ichimoku Cloud and ADX
The Ichimoku Cloud and the Average Directional Index (ADX) are advanced technical analysis tools used to evaluate market trend, momentum strength, and dynamic support and resistance. Understanding how each operates allows traders to make more objective, data-informed decisions.
The Ichimoku Cloud
The Ichimoku Kinko Hyo system integrates trend direction, momentum, and dynamic support and resistance levels into a comprehensive charting overlay. It consists of five key components: the Tenkan-sen, Kijun-sen, Senkou Span A, Senkou Span B, and Chikou Span.
When price trades comfortably above the Cloud (Kumo), the broader bias is bullish; price action below the Cloud indicates a bearish environment.
Price trading inside the Cloud reflects an indeterminate, consolidating market state.
Crossovers between the Tenkan-sen and Kijun-sen are used to time momentum entries, with the signal's validity heavily dependent on whether the crossover occurs above, below, or inside the Cloud.
Because the Ichimoku system comprises multiple moving elements, it requires structured study and practice; no single component should be interpreted in isolation.
The ADX Indicator
The Average Directional Index (ADX) measures the absolute strength of a trend, completely independent of its direction. An elevated reading (typically above 25) indicates a robust trend—whether bullish or bearish—while a low reading reflects a sideways, range-bound market.
The ADX is commonly paired with the Positive (+DI) and Negative (-DI) Directional Indicators to confirm directional bias. However, the 25 threshold is a general baseline rather than a rigid rule; baseline parameters must be adjusted and validated according to asset volatility and charting timeframes.
Common Pitfalls When Using Technical Indicators
A frequent error among developing traders is overloading charts with excessive indicators without mastering the mechanics of each tool. This creates conflicting signals, cognitive fatigue, and execution paralysis.
- Relying on a single indicator: No single metric captures the entirety of market dynamics; an indicator should never serve as an isolated trade trigger.
- Indicator redundancy: Stacking multiple momentum tools creates an illusion of confirmation while merely duplicating the same mathematical output.
- Using default settings blindly: Standard parameters are general baselines that often require calibration across different asset classes and timeframes.
- Ignoring market context: Trend-following tools underperform in sideways markets, just as range oscillators fail during parabolic trends.
- Treating overbought/oversold as reversal guarantees: Strong trends can keep momentum oscillators pinned in extreme zones for long durations.
- Altering rules mid-trade: Shifting indicator rules after entering a position introduces emotional bias and invalidates performance tracking.
- Over-optimizing on small samples: A setup that performed well over a brief window may fail across varying volatility regimes.
- Ignoring execution costs and slippage: A theoretically profitable indicator signal can become negative-expectation once spreads and commissions are factored in.
Many traders mistakenly prioritize indicators that produce high signal frequency over tools that build structured, repeatable execution. More signals simply generate more market noise, not better trade quality.
Integrating Indicators with Risk Management
Technical indicators can never compensate for poor risk management; even the highest-confluence setups fail when market conditions shift unexpectedly.
Traders must establish position sizing, stop-loss placement, and maximum allowable capital risk before entering any trade. Risk parameters should never be expanded simply because the market is testing an invalidation level.
The ATR is an effective tool for standardizing stop-loss placement relative to current market volatility, while structural support and resistance levels provide clear points for trade invalidation.
Stop placement and position sizing are fundamentally linked. As market volatility expands and requires a wider stop distance, the absolute position size must be reduced to ensure the total dollar risk remains strictly within predetermined limits.
Trading rules should be backtested across historical data and audited within a simulated environment over a statistically significant sample size. The objective of testing is not to create an infallible system, but to establish realistic win rates, risk-reward ratios, expected drawdown profiles, and the specific market conditions where the strategy underperforms.
Maintaining a trade journal that records setups, entry logic, exit triggers, and final metrics allows traders to systematically differentiate between strategic edge decay and operational execution errors.
Developing a Practical Understanding of Indicators
Building technical competence requires more than memorizing indicator names and default threshold levels.
Begin with a single indicator. Study its mathematical formula, then observe how it behaves across trending and consolidating conditions on multiple timeframes.
Next, introduce a second, non-correlated tool that addresses a different dimension of the market. If your foundation is a moving average for trend identification, pair it with the RSI for momentum or the ATR for volatility management.
Log scenarios where the indicators align successfully, as well as setups that break down, avoiding conclusions drawn from isolated trades.
This methodical approach transforms an indicator from an arbitrary squiggly line on a chart into an objective component of a structured decision-making framework.
Within the educational modules at Evest Academy Pro, technical indicators are taught alongside price action, risk management, and market structure—because an indicator is effective only when integrated into a comprehensive, disciplined trading plan.